A brief introduction
There are 4 options under the Combine function: Unite, Subtract, Unite at overlap, and Subtract at overlap.
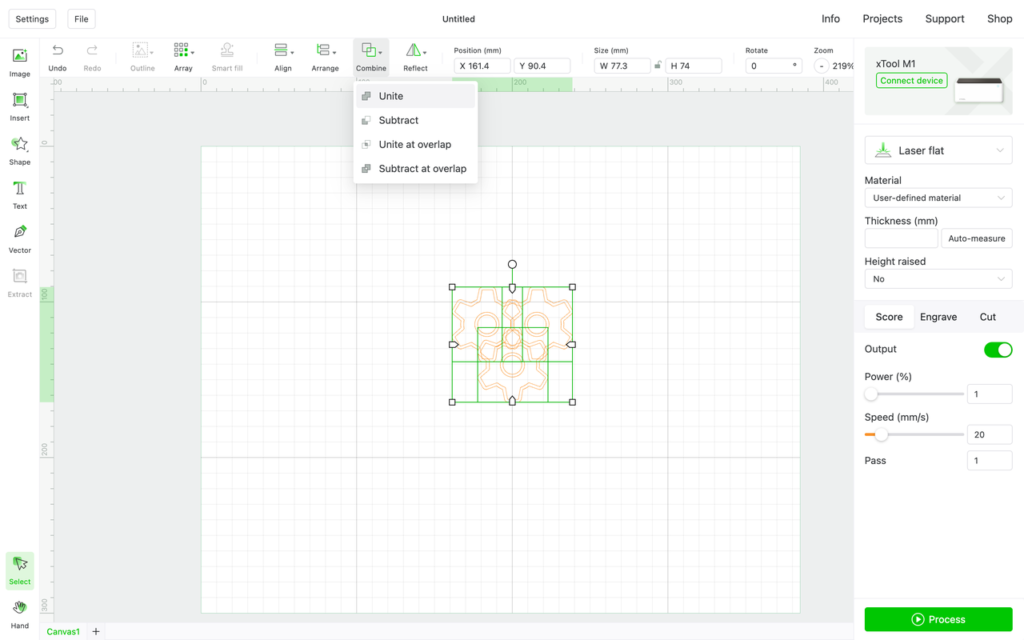
To use the Combine function, you need to select 2 or more vector elements, such as imported SVG/DXF files, graphics drawn by insert/shape/vector tools, and text entered.
Please note that the Combine function cannot be used on bitmaps. If you select bitmap and vector images at the same time, the function cannot be enabled, either.


Unite merges 2 or more vector elements into a new one. Overlapping lines within elements will be merged together.
As you see, I clicked the Engrave button, and the merged shape is filled in.


Subtract is opposite to Unite. It removes the element in the front.

Unite at overlap only retains the overlapping area of vector elements, and the rest is removed automatically.


Subtract at overlap is opposite to Unite at overlap. It removes the overlapping area of the vector elements, and the rest is retained.


The difference between Combine and Group Function
1.Combine merges 2 or more vector elements into one, while Group identifies multiple elements a united group and works on it. Group does not change the number of elements.
2.Combine merges elements and removes certain overlapping areas, while Group does not change the element itself.
3.If you want to go back to the original elements after using Combine, you can only undo the Combine action. However, you can Ungroup or undo the Group action.

Cases of the Combine function
I. Making Concentric Circles
Step 1: Draw a circle (W: 100; H: 100).
Step 2: Copy the circle and adjust its size to W: 80; H: 80.
Step 3: Place them in the same center point and select Subtract at overlap.
Step 4: Engrave the new element.


II. Making a maple leaf silhouette
Step 1: Insert a rounded rectangle shape, and set the Engrave mode.
Step 2: Insert a maple leaf shape and place it under the rectangle.
Step 3: Select Subtract to get the maple leaf silhouette.

Welding text
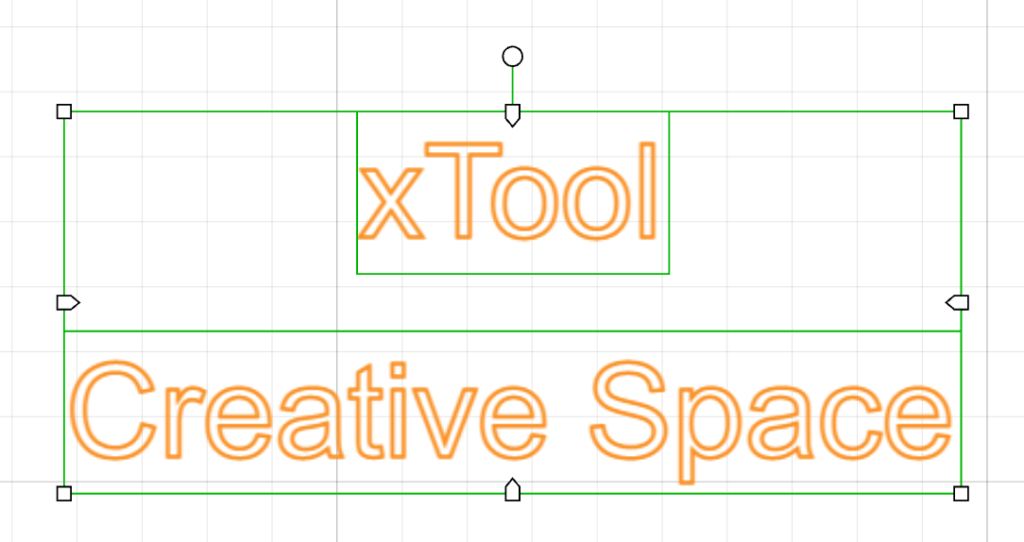
Step 1: Add two rows of text, one at a time. Please don’t insert a line break in one text area.
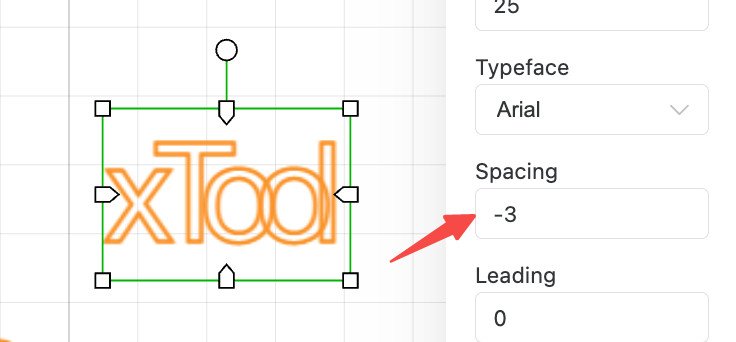
Step 2: Click the text and set a negative spacing value to overlap the letters.
Step 3: Drag the two rows of text to overlap them.
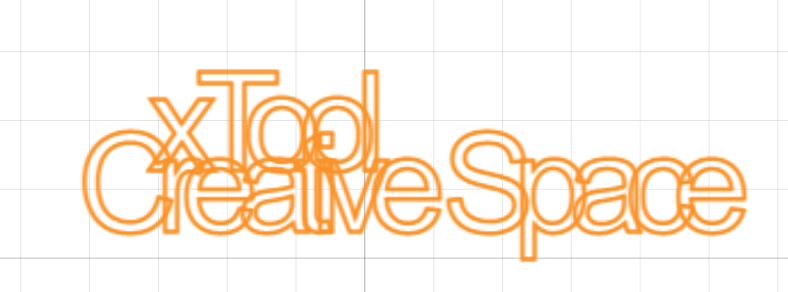
Step 4: Select the texts and Unite them.
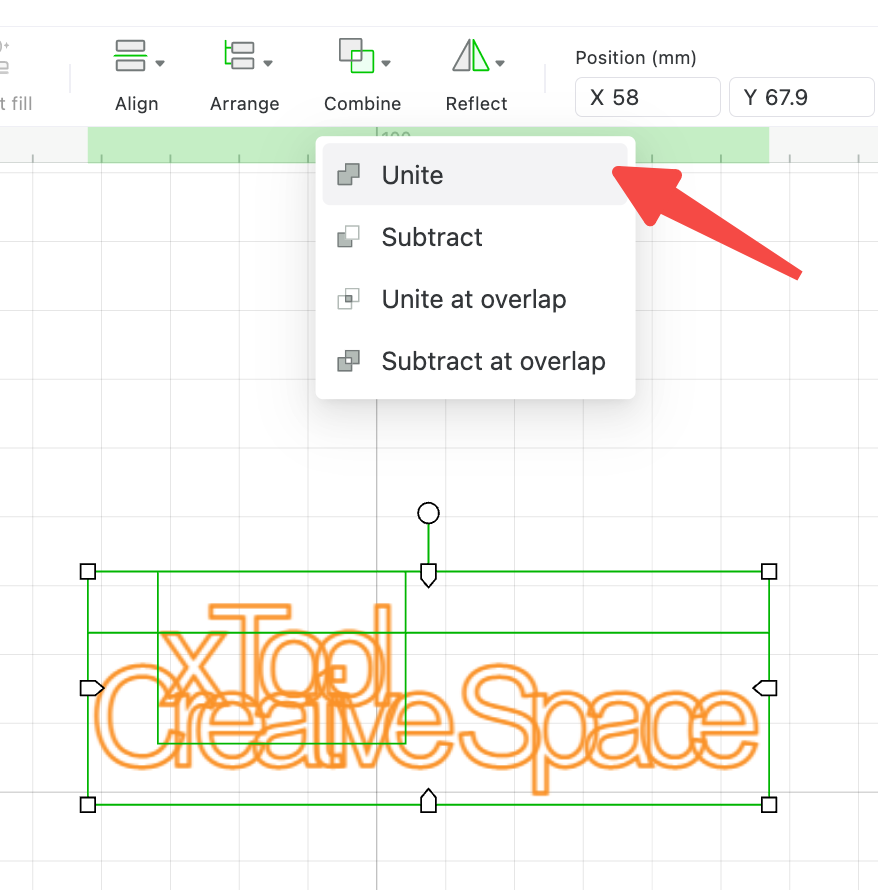
It’s done!

III. Fill in the drawing
If you import a SVG to XCS and use the Engrave mode to process it, the entire graphic will be filled in. Let’s see how to fix this problem!

Step 1: Select the whole graphic.
Step 2: Select Subtract at overlap.
Step 3: Click Engrave to see the effect.
Mission accomplished!


Services & Help
Learn & Community
Contact Us
Copyright © 2025 xTool All Rights Reserved.