'%3e%3cg%20filter='url(%23filter0_d_3916_32812)'%3e%3cpath%20d='M4.03653%205.89355L6.13751%207.2942C6.52689%207.55379%207.05202%207.45754%207.32402%207.07673L9.62688%203.85271C9.84088%203.5531%2010.2573%203.48371%2010.5569%203.69771C10.6167%203.74047%2010.6691%203.79284%2010.7119%203.85271L13.0148%207.07673C13.2868%207.45754%2013.8119%207.55378%2014.2013%207.29419L16.3022%205.89355C16.6086%205.68931%2017.0225%205.77209%2017.2267%206.07845C17.3145%206.21019%2017.3526%206.36889%2017.3341%206.52614L16.2387%2015.8378C16.1991%2016.1735%2015.9146%2016.4266%2015.5766%2016.4266H4.76222C4.42416%2016.4266%204.13962%2016.1735%204.10012%2015.8378L3.00463%206.52614C2.96161%206.16047%203.22317%205.82917%203.58884%205.78615C3.74609%205.76765%203.90479%205.80572%204.03653%205.89355ZM10.1694%2012.4266C10.9057%2012.4266%2011.5027%2011.8296%2011.5027%2011.0932C11.5027%2010.3568%2010.9057%209.75991%2010.1694%209.75991C9.43302%209.75991%208.83608%2010.3568%208.83608%2011.0932C8.83608%2011.8296%209.43302%2012.4266%2010.1694%2012.4266Z'%20fill='url(%23paint0_linear_3916_32812)'/%3e%3c/g%3e%3c/g%3e%3cdefs%3e%3cfilter%20id='filter0_d_3916_32812'%20x='1'%20y='3.57349'%20width='18.3386'%20height='16.853'%20filterUnits='userSpaceOnUse'%20color-interpolation-filters='sRGB'%3e%3cfeFlood%20flood-opacity='0'%20result='BackgroundImageFix'/%3e%3cfeColorMatrix%20in='SourceAlpha'%20type='matrix'%20values='0%200%200%200%200%200%200%200%200%200%200%200%200%200%200%200%200%200%20127%200'%20result='hardAlpha'/%3e%3cfeOffset%20dy='2'/%3e%3cfeGaussianBlur%20stdDeviation='1'/%3e%3cfeComposite%20in2='hardAlpha'%20operator='out'/%3e%3cfeColorMatrix%20type='matrix'%20values='0%200%200%200%200.959049%200%200%200%200%200.769761%200%200%200%200%200.462167%200%200%200%200.3%200'/%3e%3cfeBlend%20mode='normal'%20in2='BackgroundImageFix'%20result='effect1_dropShadow_3916_32812'/%3e%3cfeBlend%20mode='normal'%20in='SourceGraphic'%20in2='effect1_dropShadow_3916_32812'%20result='shape'/%3e%3c/filter%3e%3clinearGradient%20id='paint0_linear_3916_32812'%20x1='3'%20y1='3'%20x2='15.5'%20y2='16'%20gradientUnits='userSpaceOnUse'%3e%3cstop%20stop-color='%23FFDD97'/%3e%3cstop%20offset='0.546154'%20stop-color='%23FFC875'/%3e%3cstop%20offset='1'%20stop-color='%23DB9440'/%3e%3c/linearGradient%3e%3cclipPath%20id='clip0_3916_32812'%3e%3crect%20width='20'%20height='20'%20fill='white'/%3e%3c/clipPath%3e%3c/defs%3e%3c/svg%3e)


Description
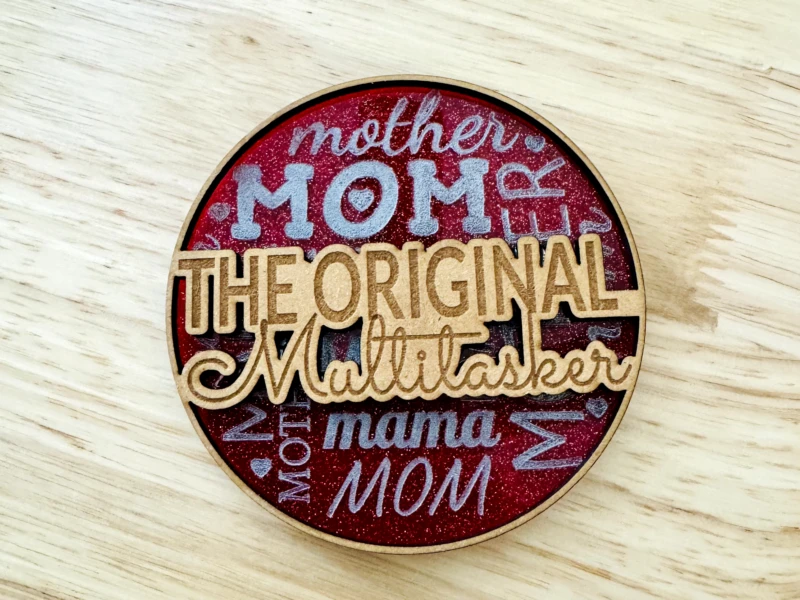
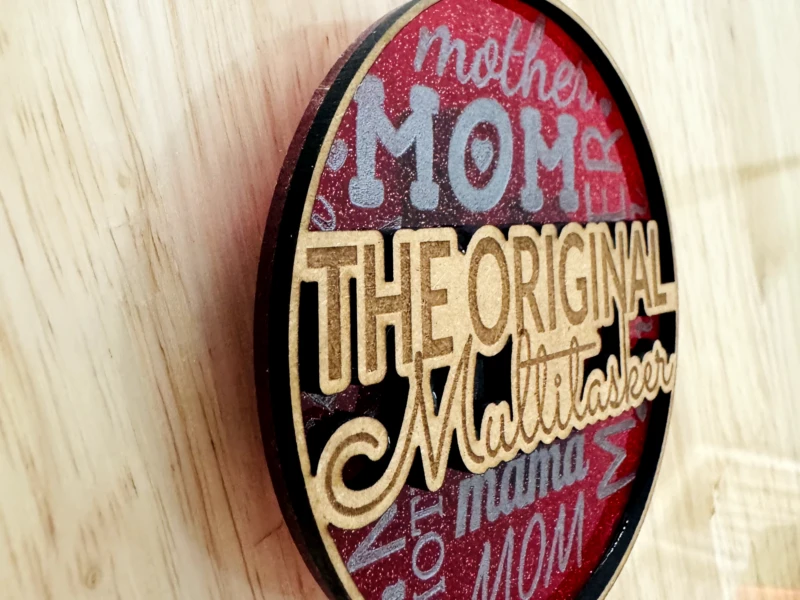
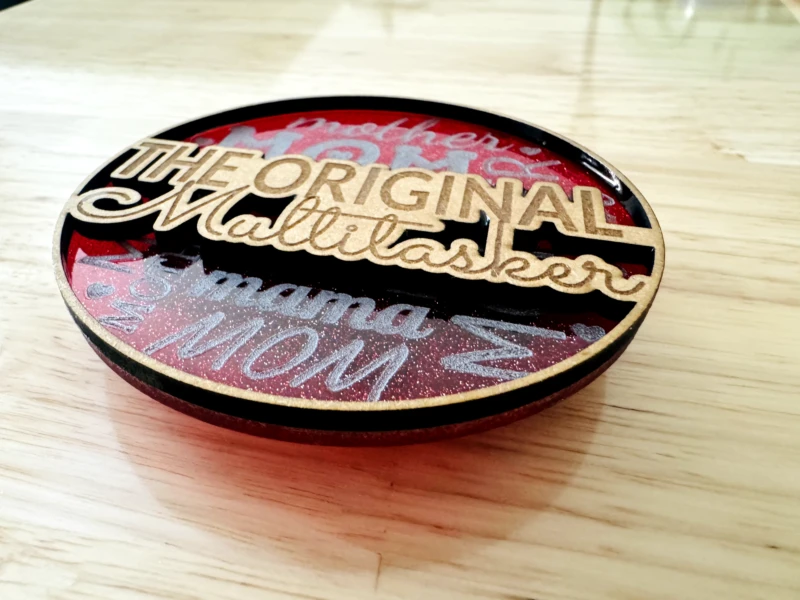
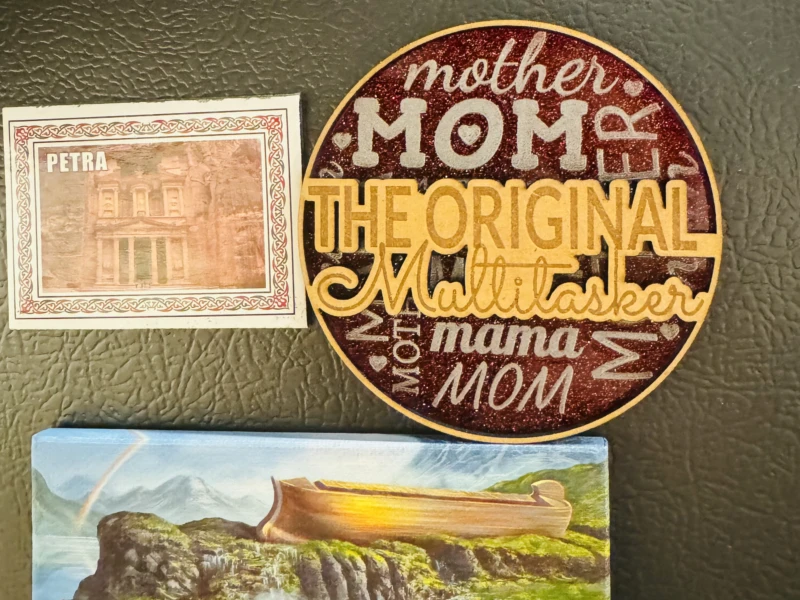
I wanted to make an another Mother's Day gift. I made a simple acrylic and draft board magnet. Both layers can be made of one material.
Production Info
Application scenario
Laser
Software
xTool Creative Space
Machine & processing module
40W
Material used
XTool Selected Materials, Red Glitter Acrylic.
3 MM GlowForge Medium Draft board.
Silver Wax finish (Rub n Buff)
Shellac clear finish.
Total time
20 min
Also compatible with other machines. Visit the Material EasySet Library for more.
License

This license allows reusers to distribute, remix, adapt, and build upon the material in any medium or format for noncommercial purposes only, and only so long as attribution is given to the creator. If you remix, adapt, or build upon the material, you must license the modified material under identical terms.
 There are no comments yet.