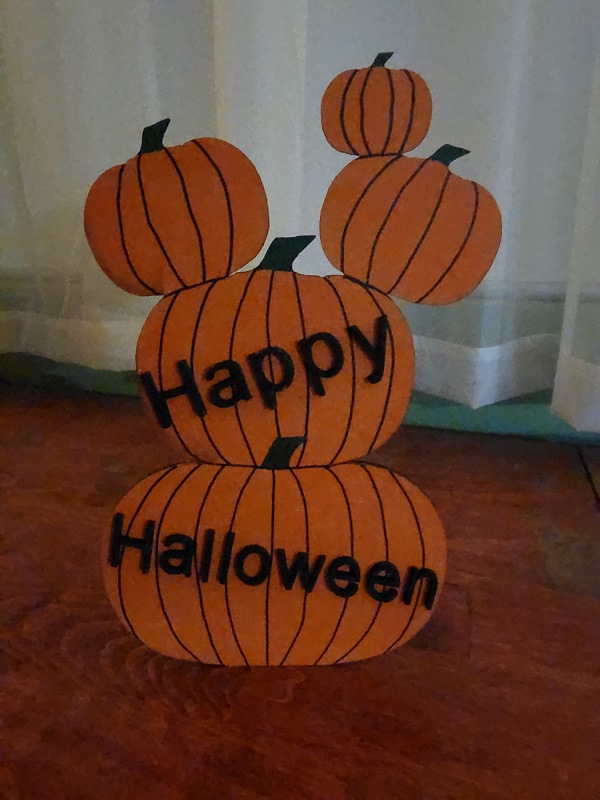
Pumpkin stand
 Instruction
Pumkin stand designed in about 10 minutes in XCS.
Insert a picture of a pumpkin.
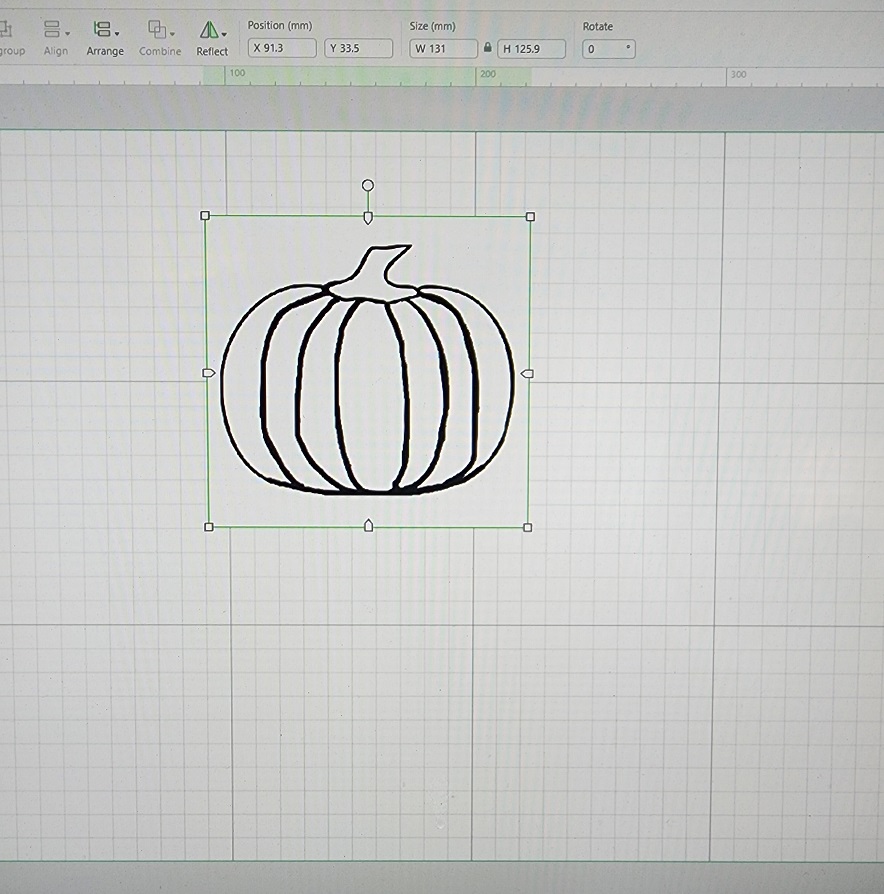
Remove the background and click on the image and click outline. Set the outline you want. In this case i set the outline to zero.
Move away the outline from the image and set the cut settings
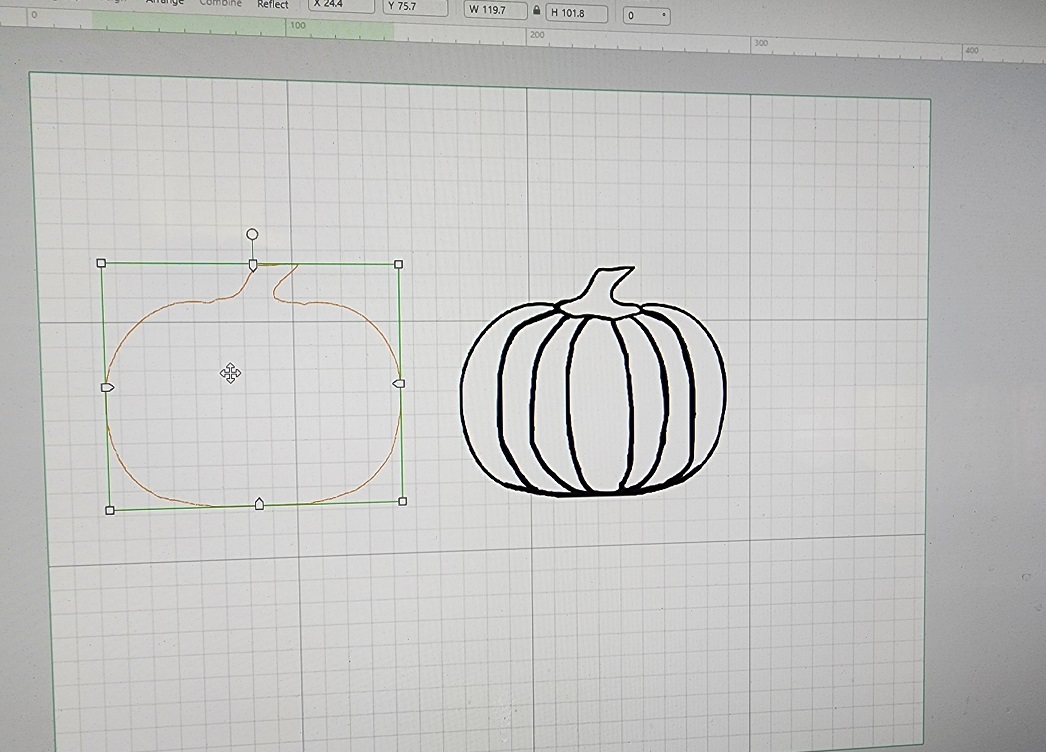
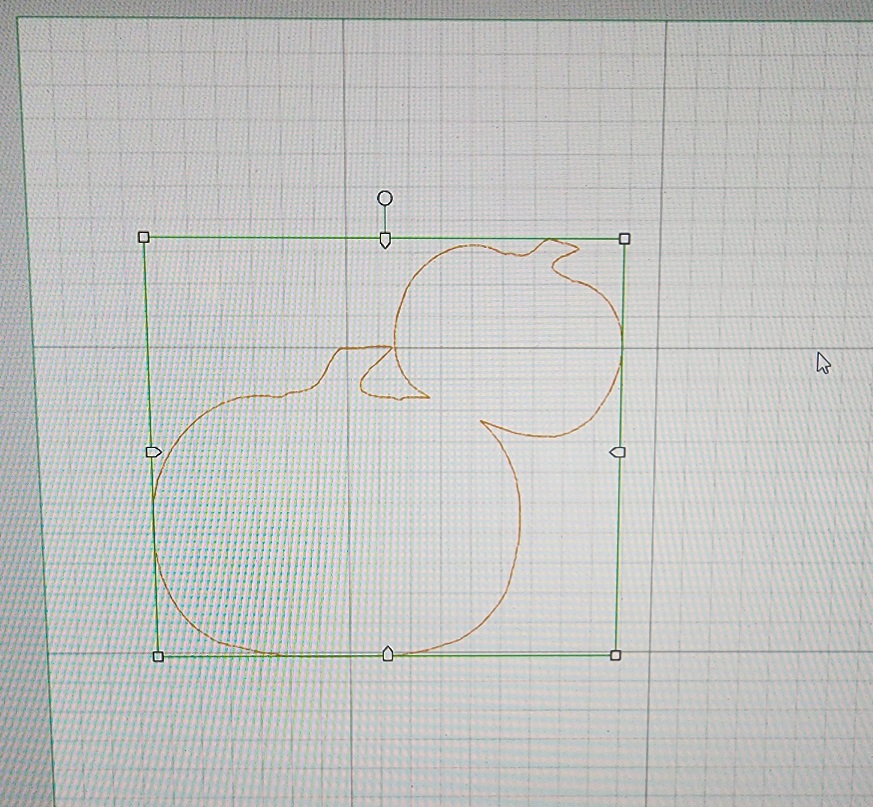
Copy and paste the pumpkin outline and make the 2nd pumpkin smaller and overlap it a little bit with the first pumpkin outline.

Hoover over both outlines and click combine, then Unite.
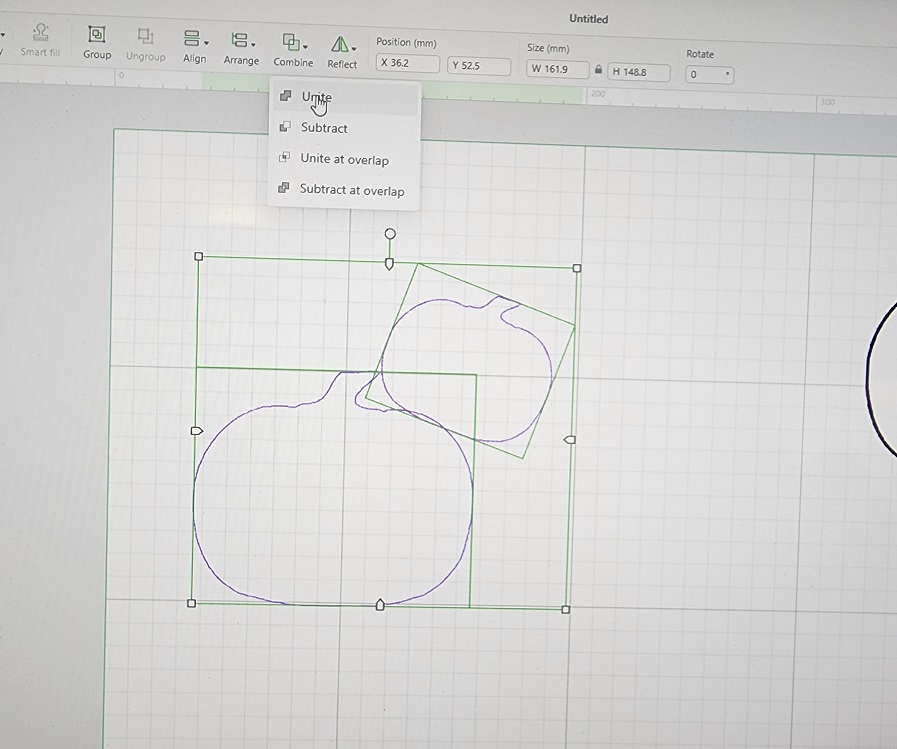
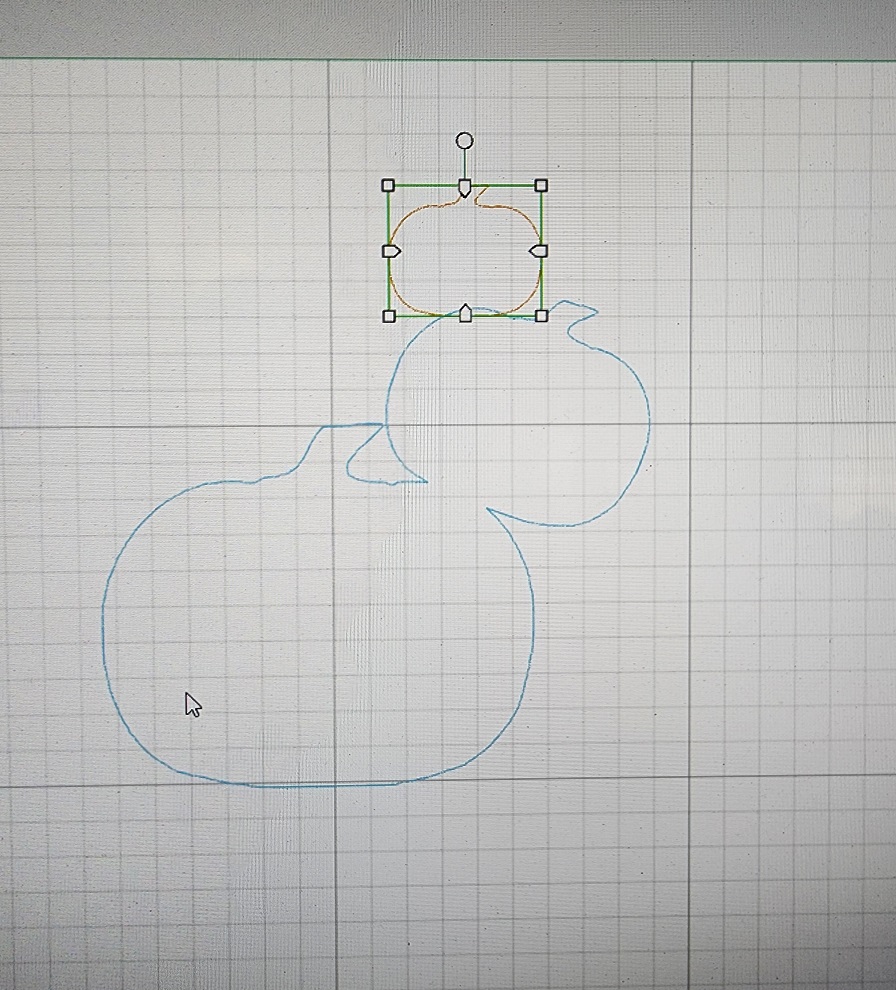
Both pumpkins are now United
Paste another pumpkin outline and stack it on the previous one. Overlapping again and click combine, then Unite.
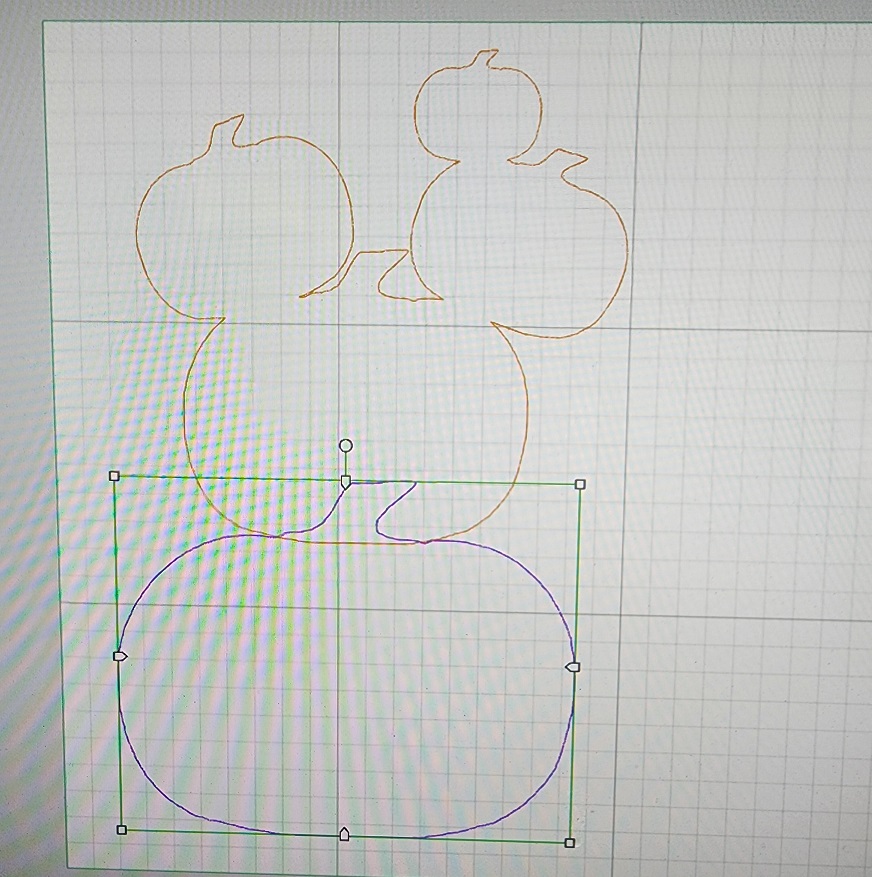
Now you have 3 Pumpkins attached to each other.
Do this with as many pumpkins you like. Keep adding a pumpkin, overlap a little bit and combine, Unite.
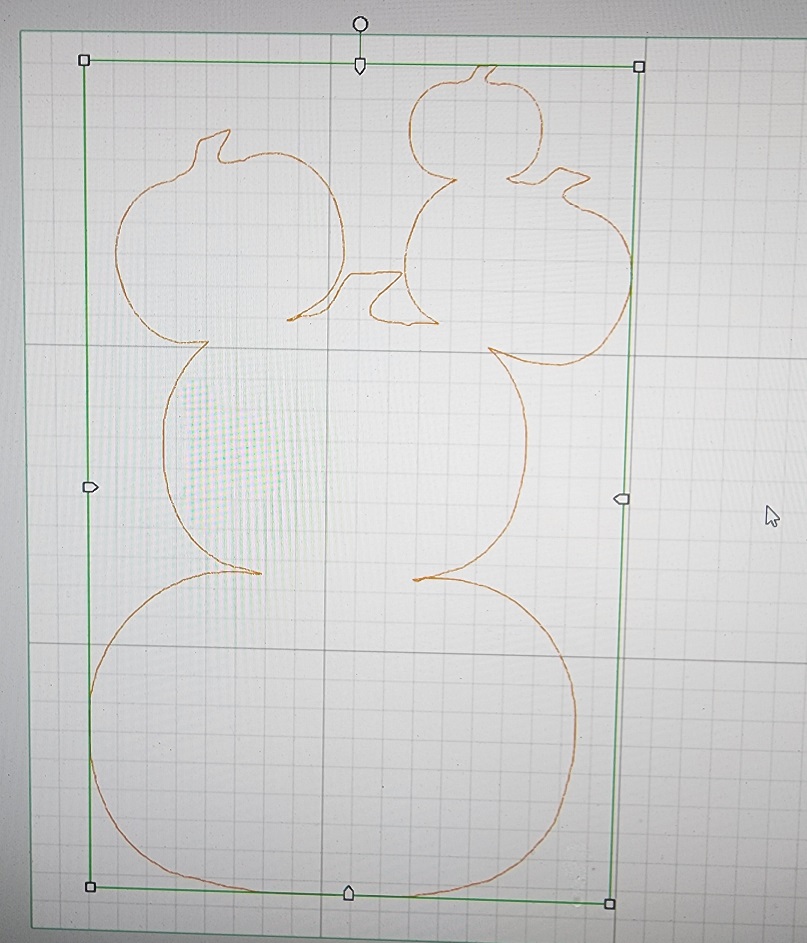
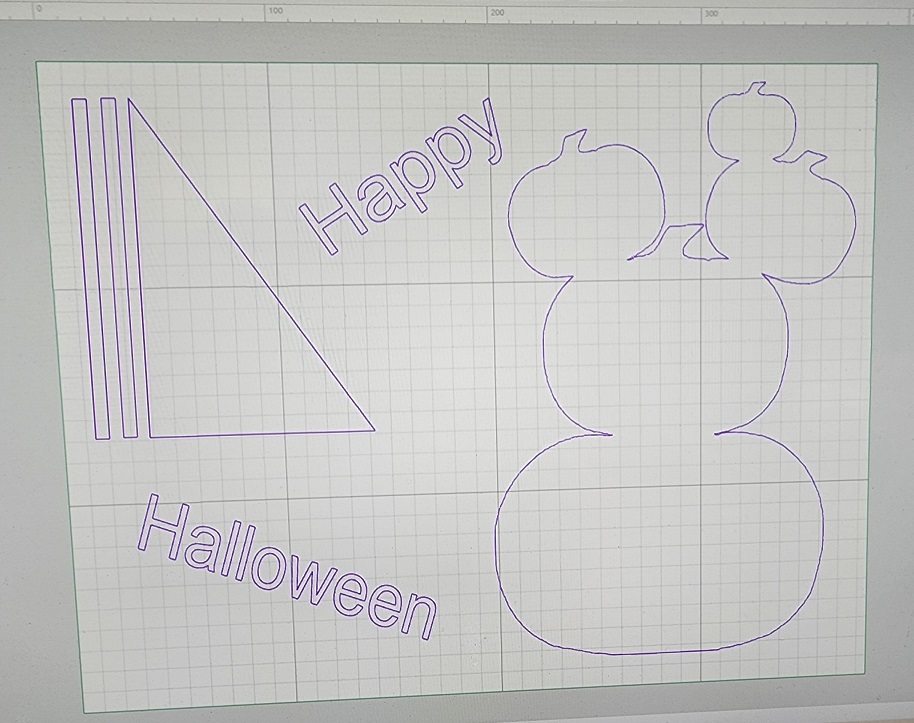
Now that you have all pumkins Attached, you can then set the settings to cut
Go to shape on the left side of XCS screen and click on the triangle.
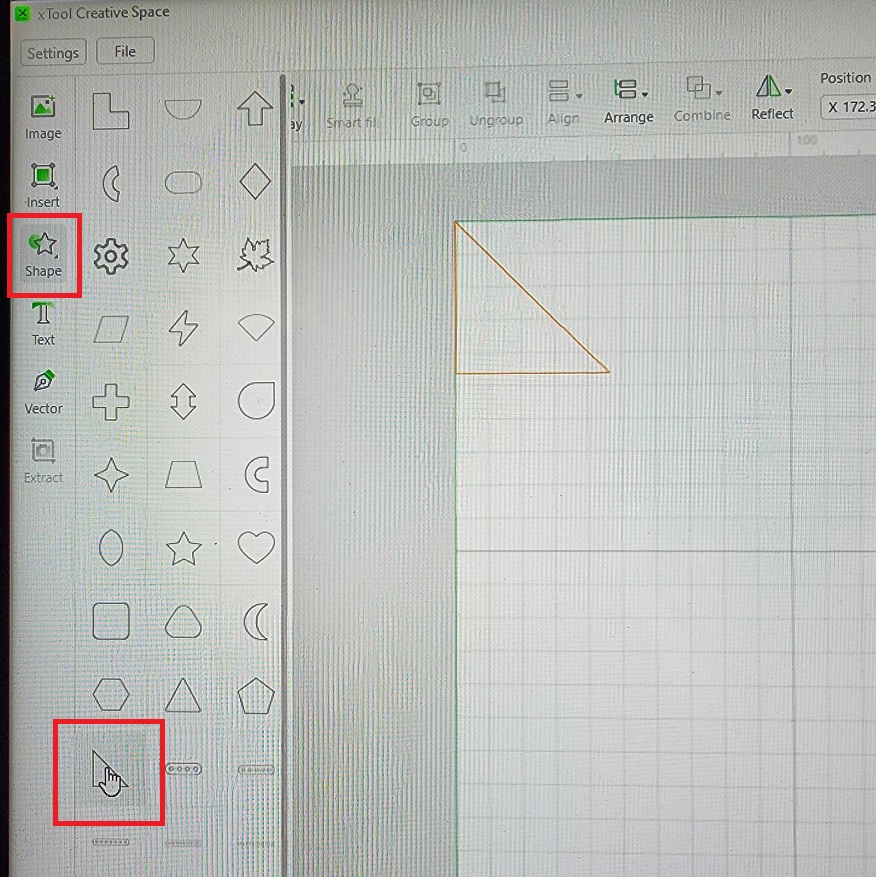
Drag on 1 of the corners of the triangle and make the tall part fit in the pumpkin in the middle, Set the setting of the triangle to cut

Once you have the triangle in the size you want, you then click on text (left screen in XCS) and start with the word Happy, then click on text
again and make the word Halloween. Set the settings to cut
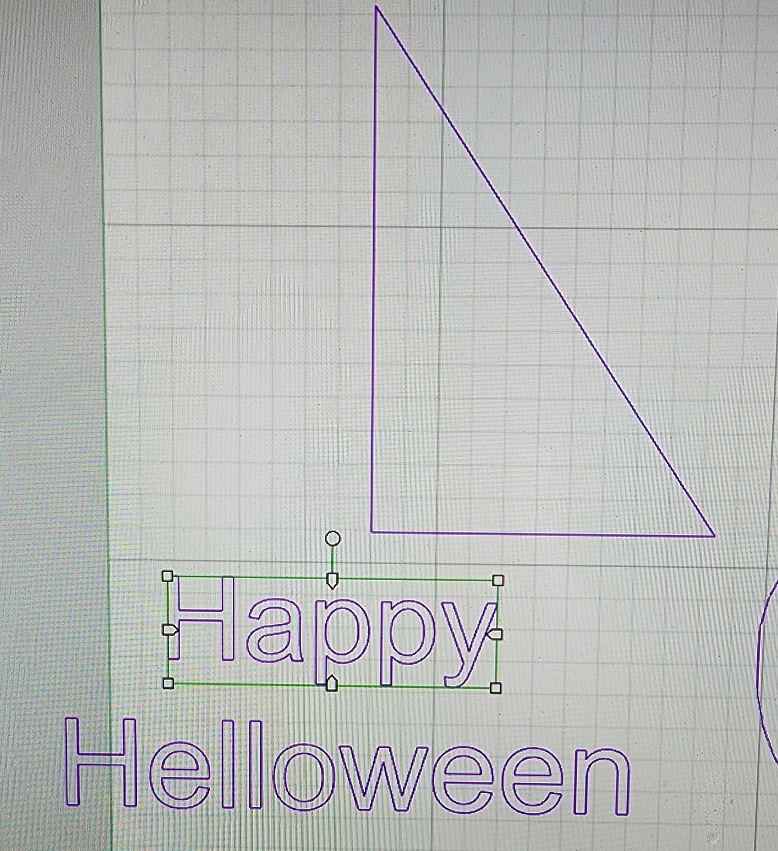
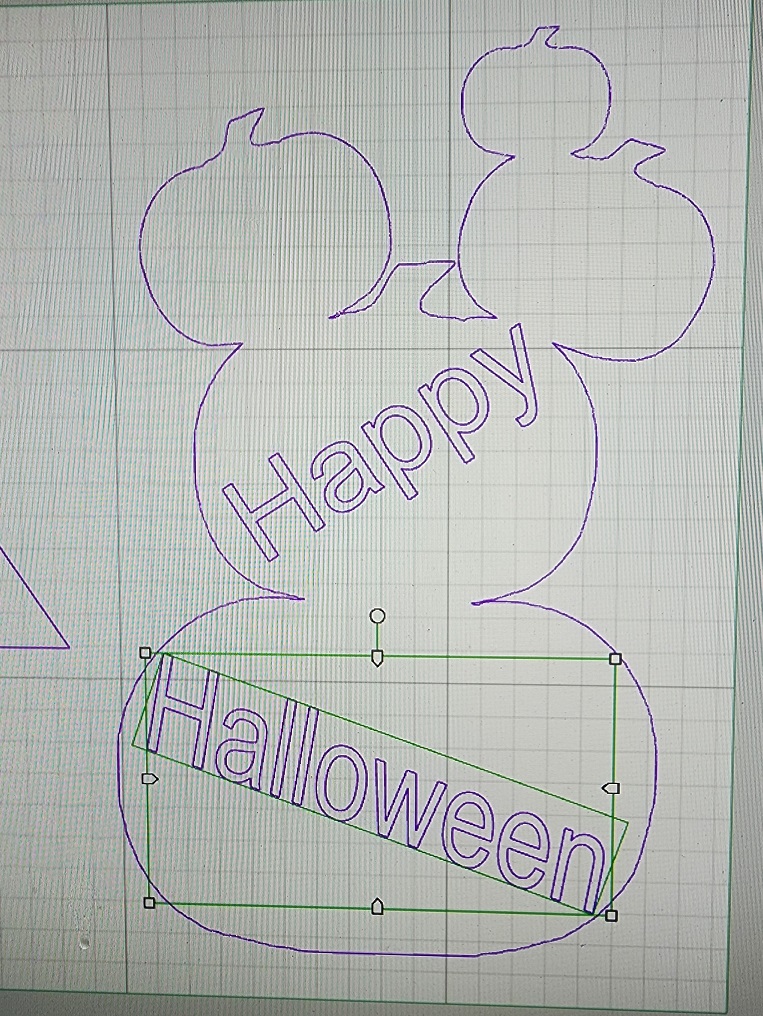
Move each word into the pumpkin to where you would like to put it and to make sure it fits with in the pumpkin.
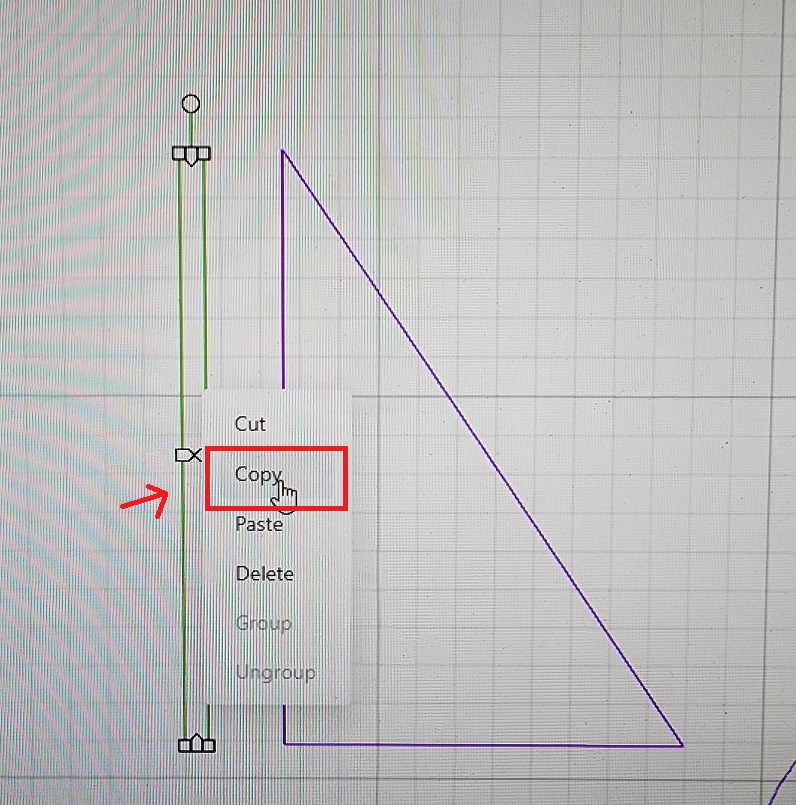
Click on insert (left side screen) and insert a square. Unlock the lock on the top of the screen and drag the square down while making it
thinner, till it's the same length of the triangle. Right click on the long bar and copy and paste, so you have 2 bars.
Now you have all shapes ready and are ready to cut. I moved the words a side, because i wanted the words on top of the pumpkins
You can also leave it and have the words cut out inside of the pumpkins.
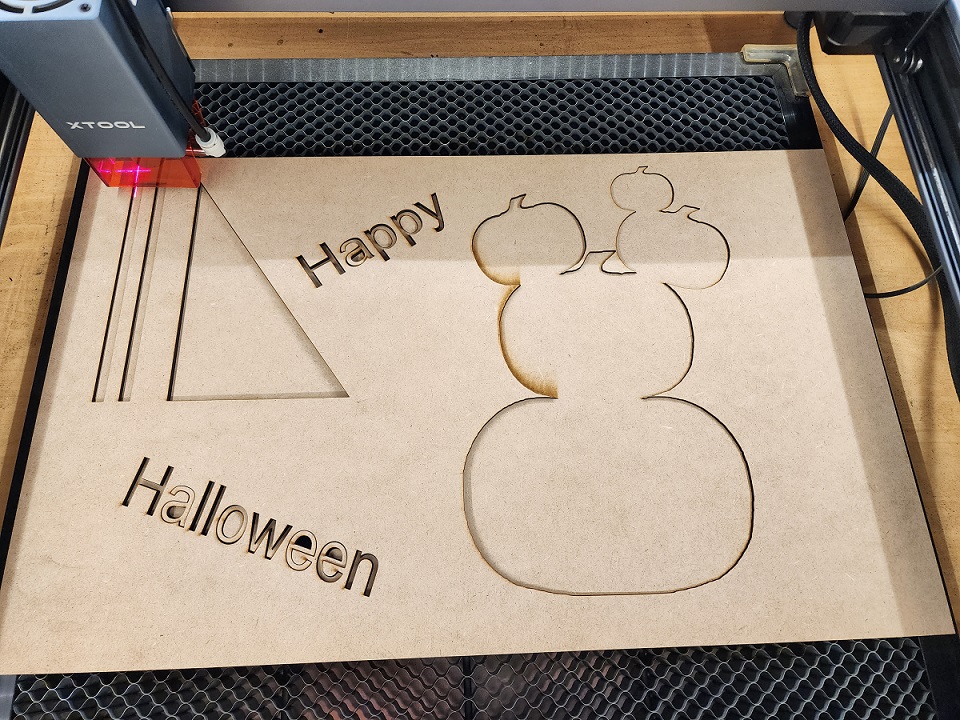
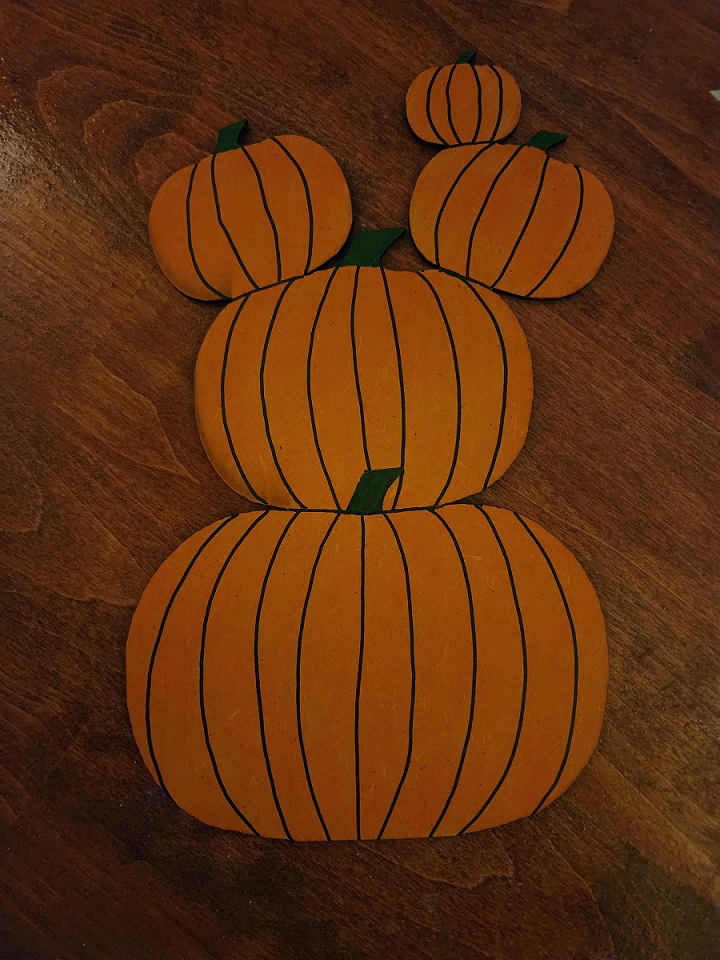
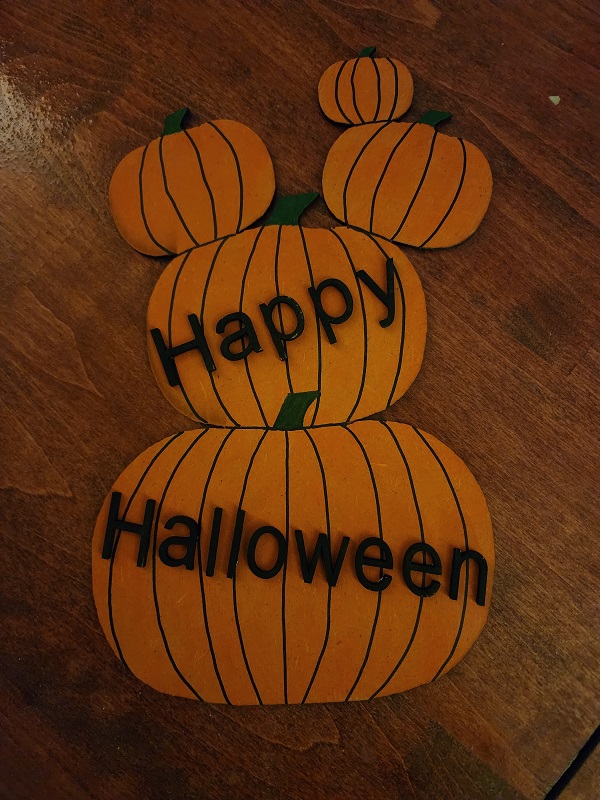
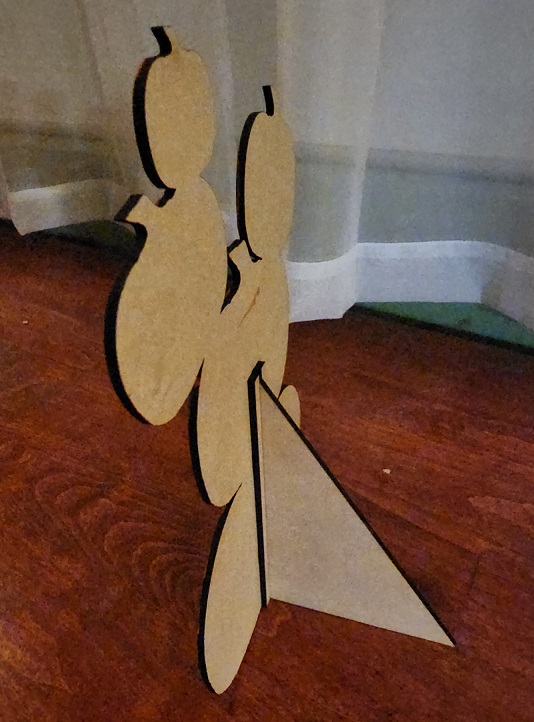
Everything is cut out and ready to paint and put together
I used orange acrylic paint and let it dry, then used a sharpie pen to draw the lines on the pumpkins.
I then glued all the letters on the pumpkins with Gorilla glue
Then i glued 1 bar to the back and put the triangle against the first bar, so i know where the second bar goes and then glue that one on.
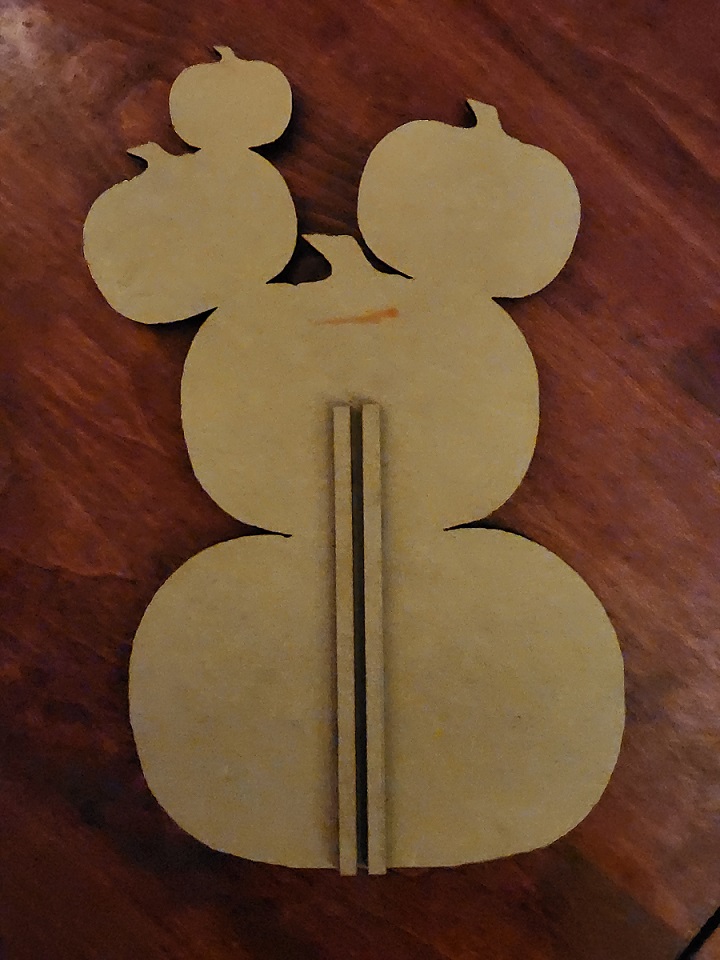
Now i stuck the triangle loose into the 2 bars and it's finished. You can also turn the triangle so it has more slant.
It took me about 10 minutes to create in XCS and cut out, painting/gluing took about 30 minutes
cause the paint had to dry first.
Hope you like this quick and easy project that anyone can make.