


![[Laser cut and engrave] Week 4 Task - 3D Lotus Flower](https://image-res.xtool.com/ali-res/community/making/d2c61aa7-6158-444f-bb49-913cceafa511.png?x-oss-process=image/resize,w_1200,h_900,limit_0/interlace,1/format,webp/auto-orient,1)
Week 4 Task - 3D Lotus Flower
 Instruction
Information
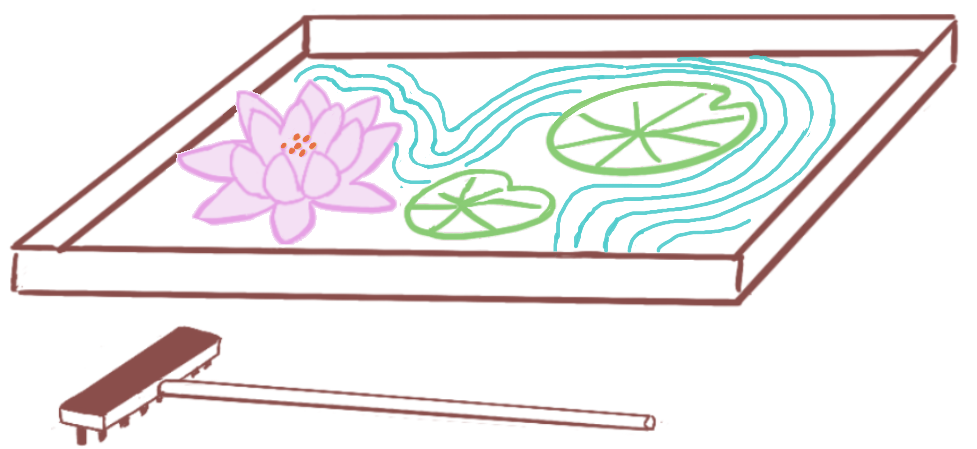
      I always wanted one of those tabletop Japanese Zen gardens, since the Week 4 Task is making something for myself, I decided to tackle this idea and see whether I will be able to create one with my M1.

Since this is my first try creating a 3D flower, it took lots of thinking, so with this how-to, I will be more focused on my thought process.
Instruction
Step1
Idea & Sketches:
This is what I have in mind, but instead of using rocks, and statues, I'm thinking to make a 3D lotus flower and some lotus leaves
Step2
Lotus Flower:
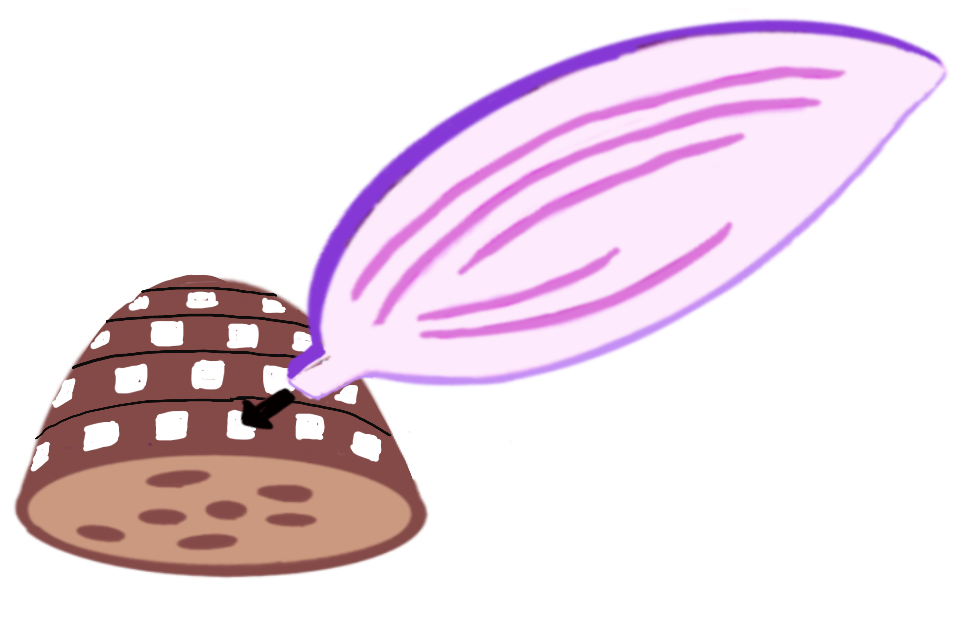
Let's look at how a lotus flower looks like
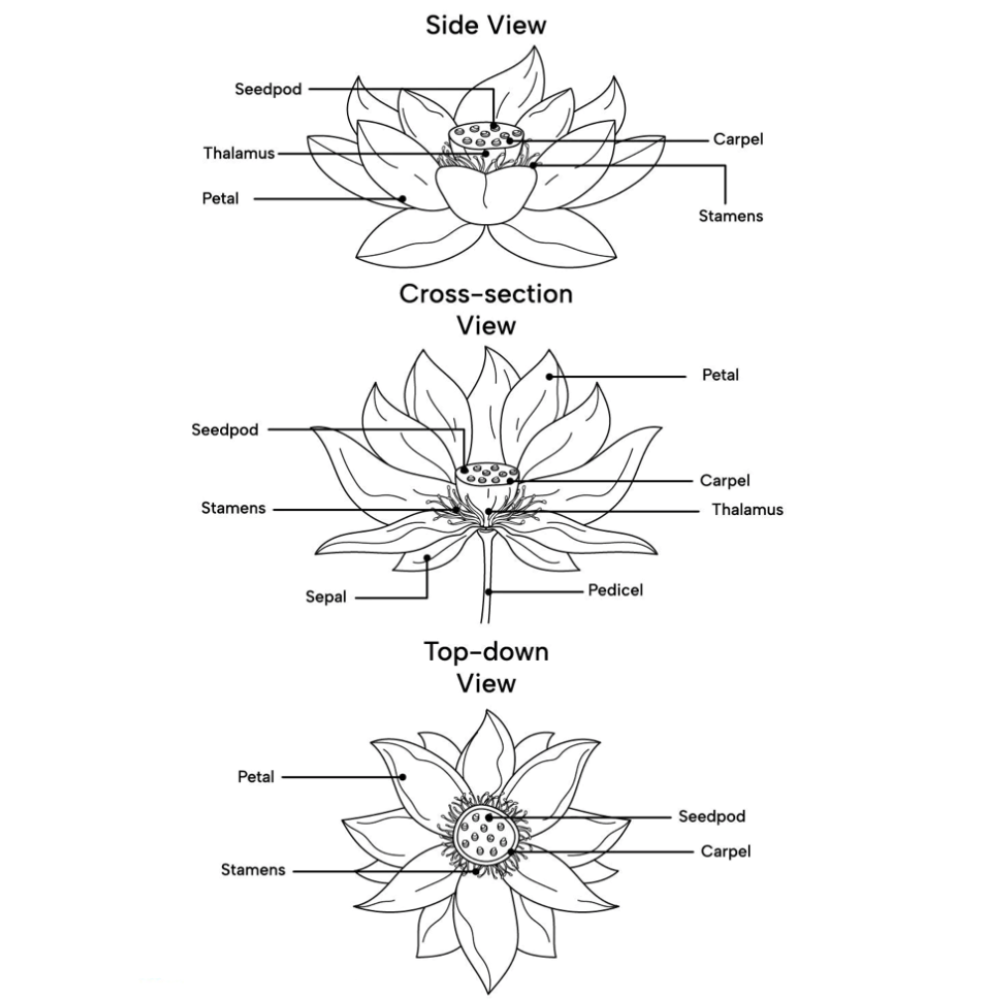
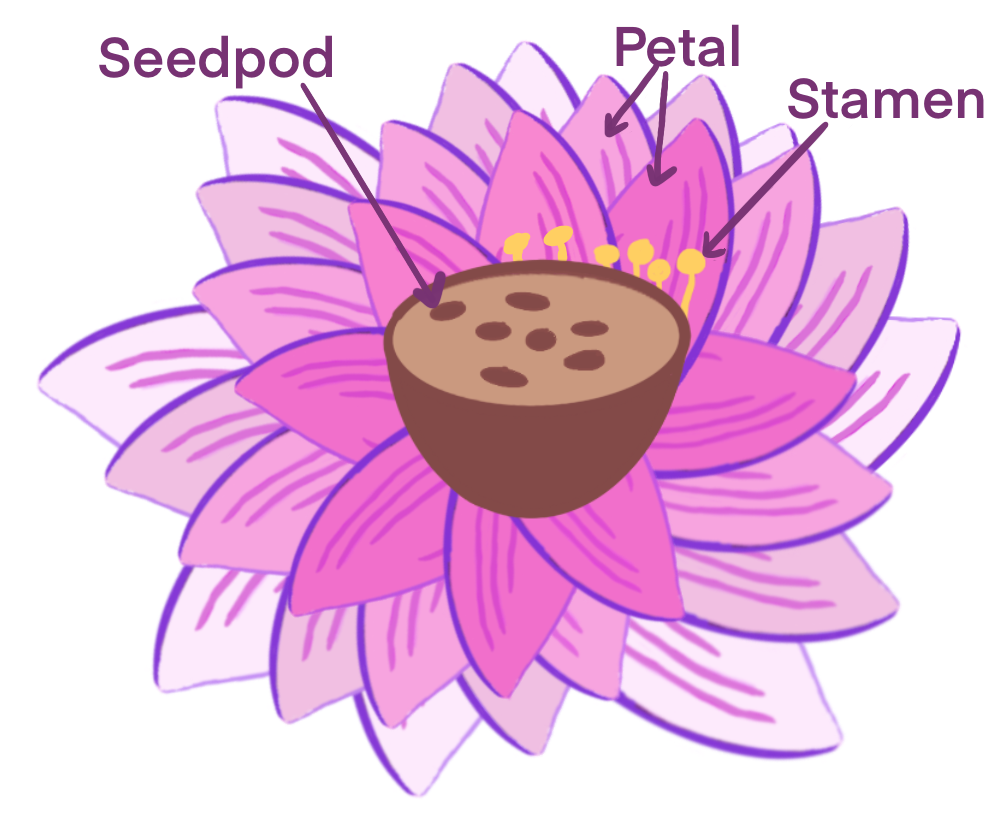
Looking at this anatomy of the Lotus flower, you can see that we will need at least flower petals, stamens, and a seedpod or some kind of center. so I sketch out this, eight petals look fine at this point:

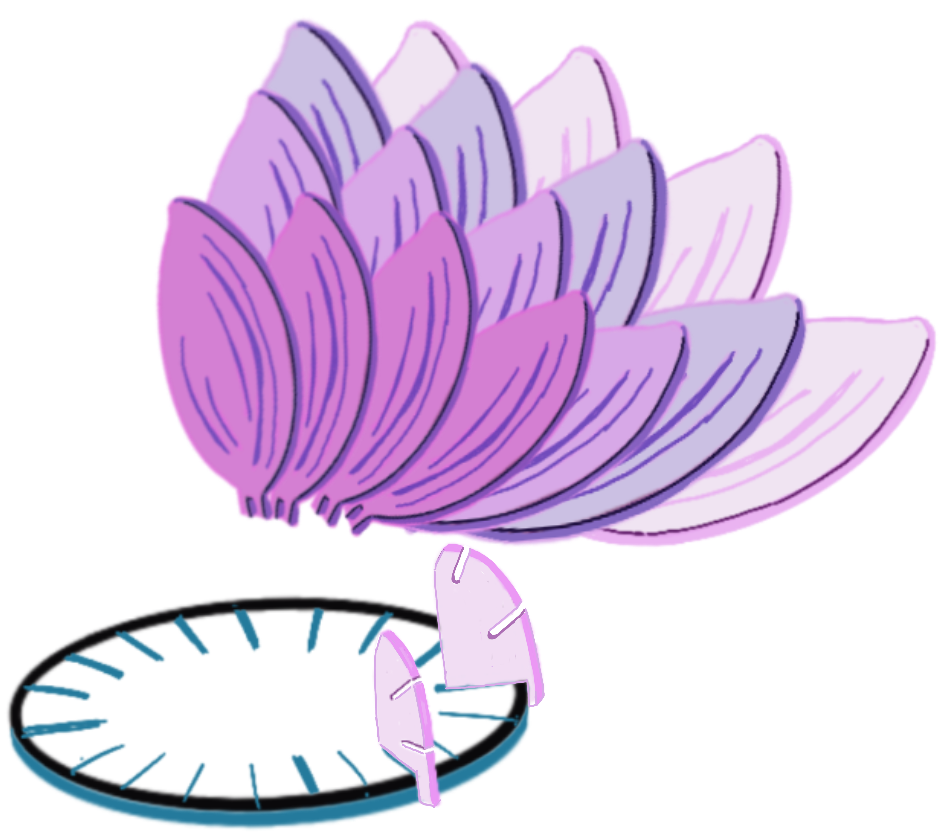
A seedpod in the center then surrounds it with some stamens and flower petals. But to make it richer looking, more layers of flower petals can be added.
With each layer added, the petals are going rotated and fall in between the petals of the previous layer. I'm hoping that I can manage to put 4 layers of petals.
Step3
Structure of the Flower:
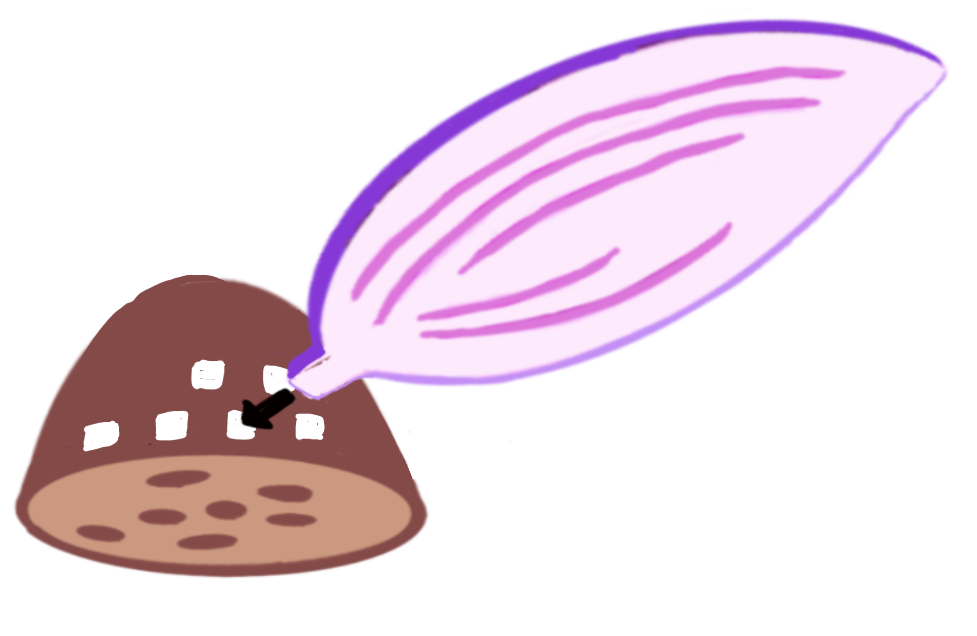
In real life, the petals are attached to the top of the stem. Ideally, I could try to connect the petal to the seedpod by dowel joint method, by making some holes in the pod, then adding a dowel on the bottom of the petal, so the petal can be inserted into the holes.
But the upside-down dome shape seedpod is not stable, even if I flatten the bottom, the small bottom to carry the largest petals still seems unstable, and also not enough room to fit all eight petals I have planned. So I turn the seedpod upside down, to get a stable and large bottomed base to place all the petals I wanted
To get this dom shape built, I was thinking that cutting a series of circles, gradually reducing the size, and gluing them together to form a solid dome shape, but with this method, the outer surface of the dome is not going to be smooth, because the laser is not able to do an angle cut; then getting the holes for the petals are not that easy, of course, I can always create the holes with a drill, but that takes a lot hand work, and the consistent result is hard to guarantee. I can always try to create a series of notches on the appropriate layers, and hopefully after gluing all layers together, the holes will be created, again this takes a lot of calculation during the designing stage, and if the thickness of the wood is off, or any miss aligns during the gluing, may cause the size of the hole incorrect. There are too many unforeseen issues to worry about.
So after some research and some thinking, I came out with the following method:
Base:
- I will draw a circle with a diameter of 1.5" for the base plate
- Since I'm planning to have 8 petals in each layer, I then create 16 slots with the width of my wood thickness and about 0.25" in depth
- Two sets of "Petal placing quarter rounds" are created, each going to have 2 slots, the first one with slots for Layer 1 and Layer 3, and the slots for Layer 2 and Layer 4 on the second one, we will alternate and insert them to the base plate. the slots are also drawn with some angle to the base plate, so different layers of flower petals will have a different angle to the base surface and not end up flat and parallel to the base surface.
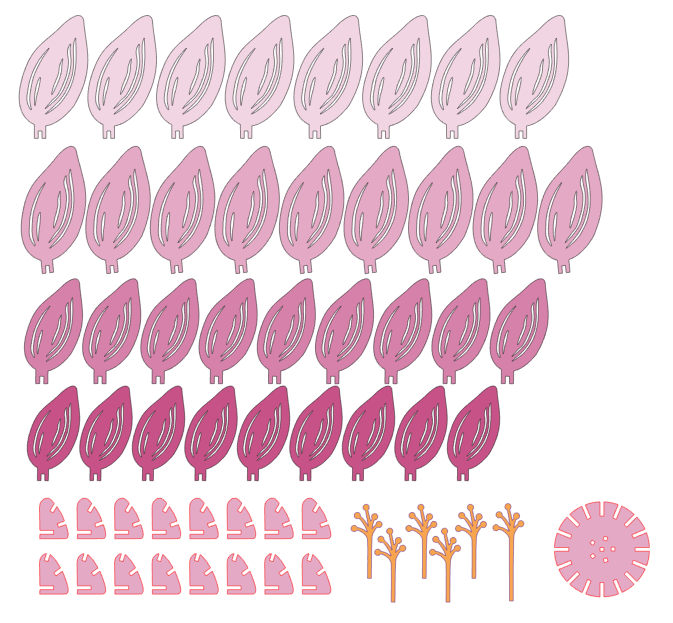
Petals:
4 sets of petals then are drawn, and each set is slightly different in size, Layer 1 is the most otter petal, it is the largest, Layer 2, I end up using the same size, Layer 3 and Layer 4 gradually decrease in size. The details on the petals are personal choices, can be left plain, can be engraved, or can be cut out. The two little legs are spaced with the width of the material thickness, it will create little locking effects when it is put together with the "Petal placing quarter rounds"

Stamens:
I have 6 holes drawn on the base plate for stamens, the center one is going to be the tallest, and the other 5, could all be the same height or maybe a little variation.

Step4
Create the Design File:
Once all the components are figured out, the hardest part of the project is done, which is time to digitize them and create the design file. From now on, every step is very straightforward and simple, so I'm not going into details, I personally use Silhouette Studio to create my design file, and you certainly can use whatever software you are familiar with, as long as you have the ability to save them to SVG format.
Now, after your design is saved to SVG and go ahead upload it to XCS, and get them cut, and then assemble it.
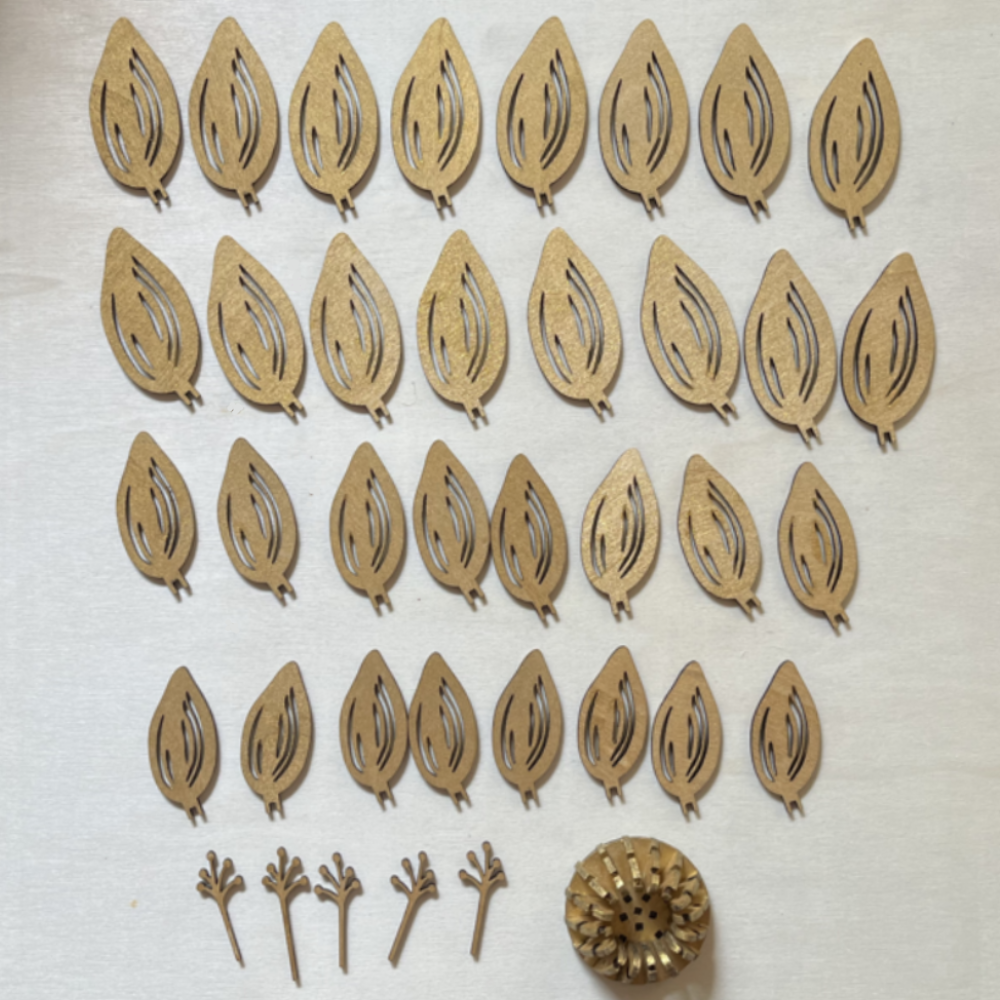
**By the way, I highly recommend painting it ahead, and painting it on both sides**
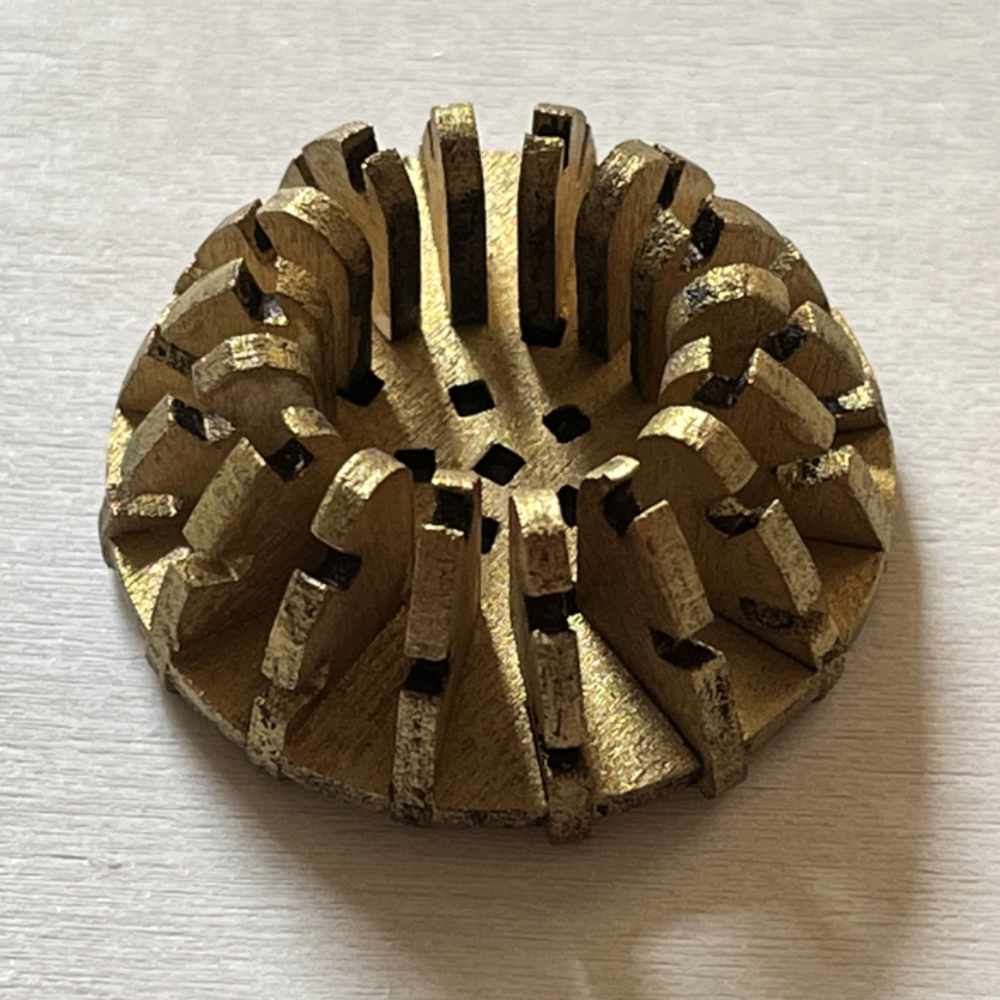
Here is the photo of the base with all the Petal Placing Quarter Rounds attached.
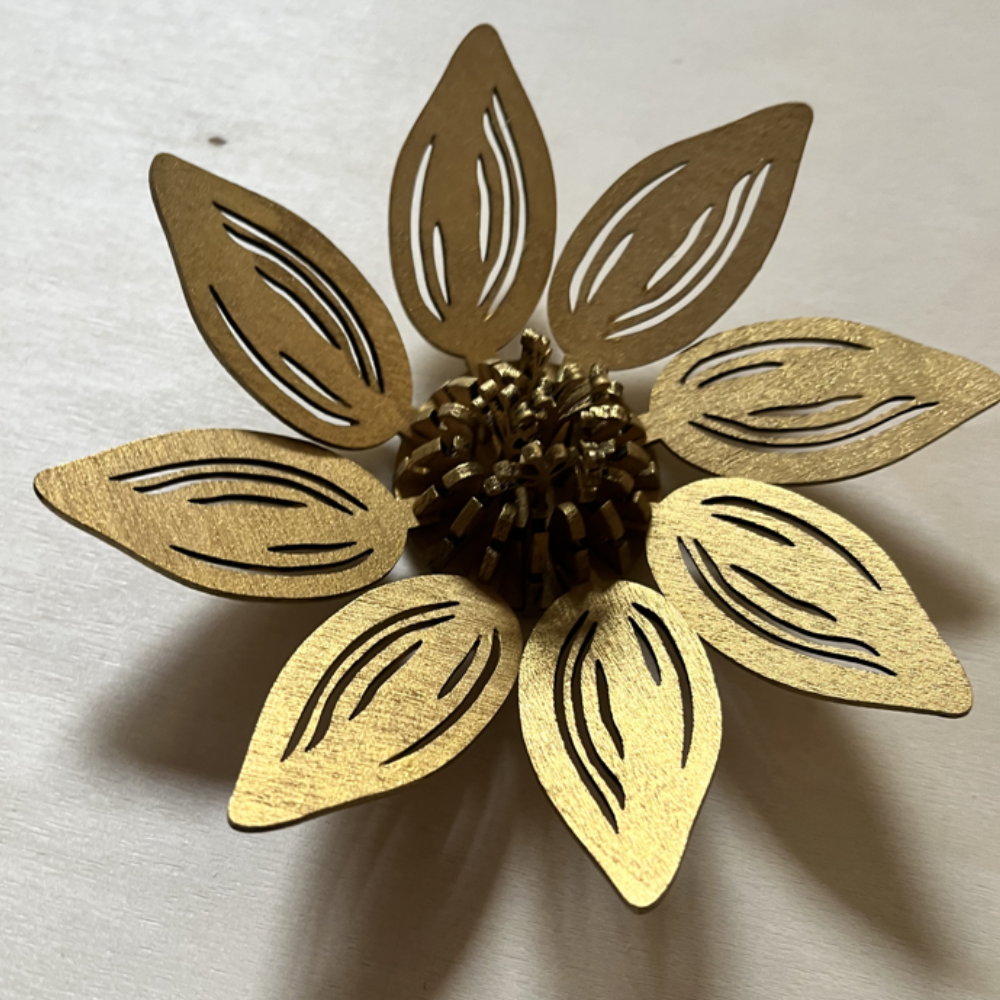
The first set of Layer 1 petals and Stamens are in place.
Layer 2 petals are inserted into their slots

Third layer petals added
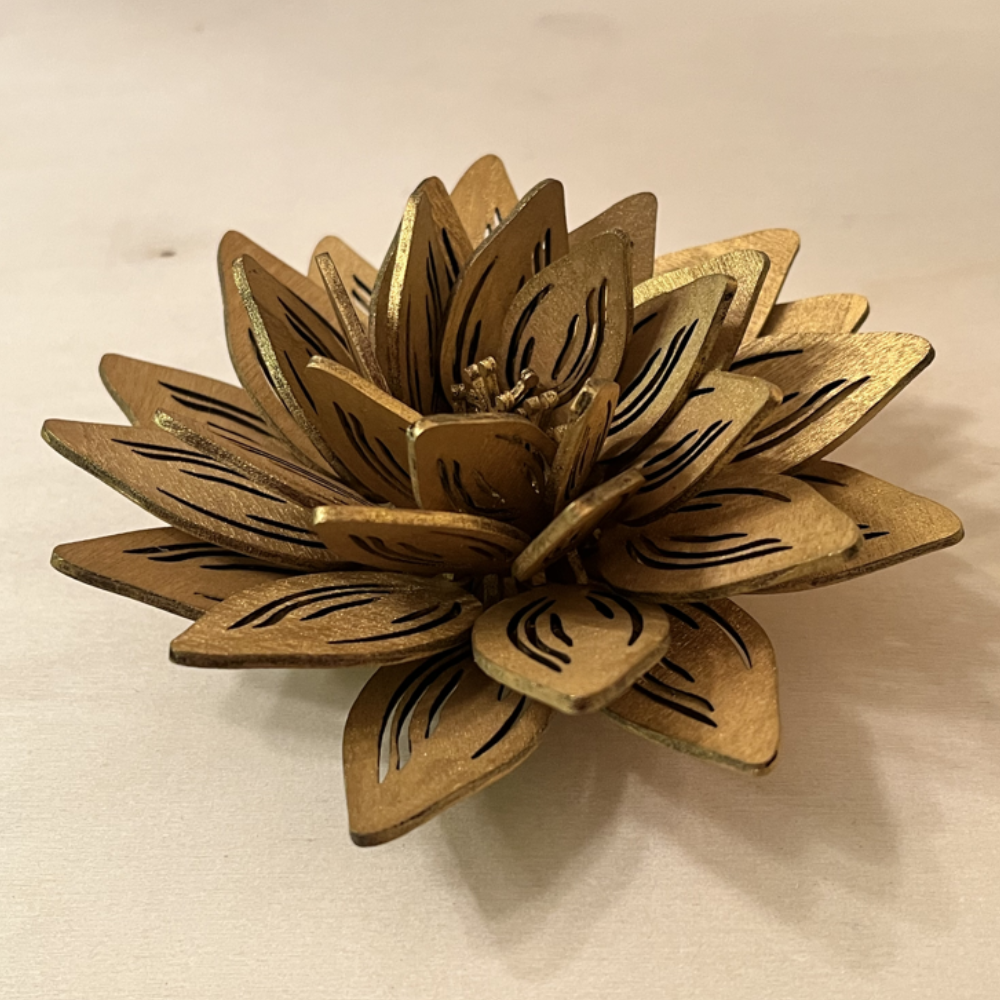
Finally, layer 4 petals are inserted, and the 3D Lotus is done. In this slotting method, I did not even have to use any glue, they fit very snugly and tightly.
What do you think about my 3D Lotus? well, I myself am quite happy with the result.
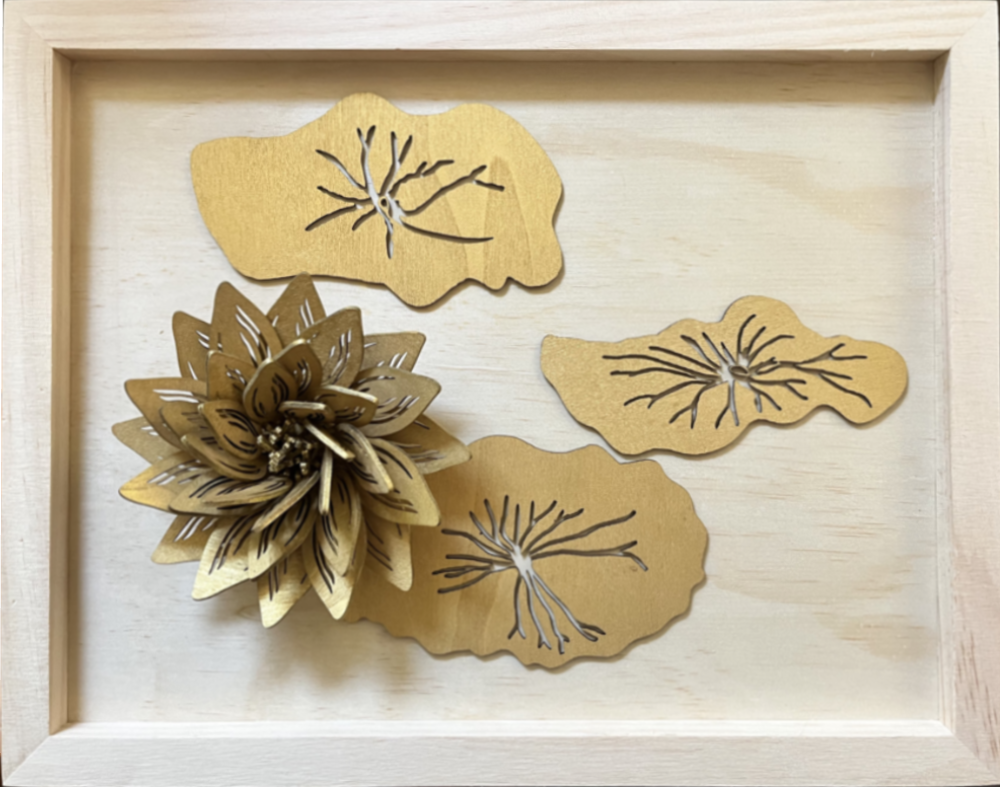
I also cut some leaves to complete the pond look, at this point, I'm not sure whether I should put some play sand in the box and make this into the Zen Garden I had intended for, or change my mind and pour a thin layer of blue resin to make this really look like a pond.....
Let me know, what would you do ?????
